What Does a Chimney Sweep Do?

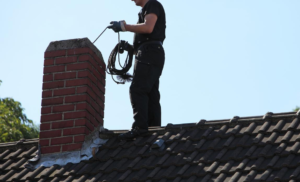
Chimney Sweep Charleston SC use special tools to make an inspection and clean your chimney. These include brushes, long rods, and safety gear like a dust collection vacuum.

Historically, boys between the ages of six and twelve were sold to chimney sweeps by their parents or found in orphanages. They were forced to climb narrow, hot flues; this is where the expression “to light a fire under someone” came from.

Soot is a thick black substance that can be difficult to clean. This is a byproduct of burning fossil fuels and organic material and can be quite damaging to surfaces that it comes in contact with if not dealt with quickly. It can also be incredibly dangerous if it is inhaled and can cause respiratory problems. It is very important to regularly have a professional chimney sweep remove soot from the fireplace and chimney.

Chimney sweeping involves the removal of soot, creosote, and other debris from the interior of the chimney flue and lining. Chimney sweeps use a variety of tools to do this including a broom chimney brush, metal brushes, ladders, tape, mirror, dirt mask or full mask, and a shop vacuum with a filter specifically designed for soot removal.

One of the most common reasons that homeowners call a chimney sweep is because of excessive soot buildup. This can occur when a chimney is used frequently or if the wood used for burning is not properly seasoned. The oil in the wood that is not completely burned up during the burning process will be carried up with the smoke and will mix with moisture and other chemicals, forming creosote, which settles on the inside of the chimney.

Oftentimes, creosote can be removed by simply brushing it away with a wire brush. However, if the creosote is very heavy and layered on, it may be necessary to use other methods for cleaning. If this is the case, a chimney sweep will use a ruff fixed on a cable with a heavy object attached from below. This is similar to the plumbing device that is used to break through clogged sewer pipes.

Another method that a chimney sweep may use is to spray soot remover inside the chimney and scrub it with a wire brush. Chimney soot remover is a special chemical that is designed to break down creosote and other deposits. When it is applied correctly by a qualified professional, this product can be very effective. If the soot remover is improperly used or if it is left in the chimney too long, it can actually make the problem worse.

Creosote Removal

Creosote is a natural byproduct of wood-burning fires, but heavy creosote buildup can cause chimney damage and lead to dangerous conditions. The good news is that it’s very easy to avoid creosote problems by using seasoned or kiln-dried wood, keeping up with regular chimney sweeping appointments, and making sure that your fireplace system is in proper working condition.

The best way to prevent creosote is to use a product like Meeco’s Red Devil Creosote Destroyer every third time you burn a fire in your fireplace. This powdered remover coats the walls of your chimney liner and prevents future creosote from sticking while also breaking down existing creosote deposits. It’s available in a 5-pound tub and should last for one season of burning fires.

When a chimney is not cleaned regularly, the deposits that form on the interior of your flue and in the chimney can become so thick that they can block the smoke from venting freely through the system. The most dangerous type of creosote is called glazed creosote, which has the appearance of a thick sugar-candy shell on the flue walls and is very difficult to remove.

If you notice that your chimney’s interior walls have a dark, shiny, tar-like coating that looks like it has been applied with a paintbrush, it is a sign of serious creosote buildup and should be cleaned by a professional chimney sweep immediately. Chimney sweeps have specialized brushes and vacuum systems that can safely remove this buildup without removing your chimney liner.

There are also chemical creosote removers that can be purchased at most hardware stores, but these products are not as effective and will take a little more work than simply brushing or using a rotary loop tool. In addition, they are usually caustic and can stain masonry surfaces, so they should be used only as a last resort.

It’s important to note that if you have a heavy creosote buildup, even the specialized tools and chemicals of a chimney sweep may be unable to remove it completely. A CSIA-certified chimney technician will have the equipment, knowledge, and training to get your fireplace system back into safe working order.

Animal Removal

Animals getting trapped inside chimneys can cause costly damage to the home and even pose a health risk. It’s essential that homeowners have the ability to identify and resolve these issues as quickly as possible to protect themselves and their families. Chimney sweeps are well trained in animal removal, have the appropriate tools and know how to handle these critters safely. They also have access to field service apps and CRM software solutions that enable them to digitally structure customer information, manage work orders, schedule appointments and dispatch technicians in a more efficient manner.

The first step in the animal removal process involves determining whether an animal is still alive or not. This can be done by listening for chirps or other sounds and by observing any fallen debris on the ground near the fireplace. If the animal is living, it may make chirping noises and struggle to escape the chimney. A live animal can be much more dangerous than a dead one as it may have rabies or other diseases that will spread to people in your home.

If an animal is alive, a chimney sweep will try to encourage it to use its established path to exit the chimney. Providing a rope or branches within the chimney to climb on will help to speed up the removal process by motivating the animal to take the route it has already established for itself. The goal is to prevent the animal from attempting to find its own way out as this could make it more difficult and painful.

Chimney sweeps must be careful to avoid disturbing the animal’s nest as it may contain eggs and young animals. This is particularly important in cases involving raccoons who can carry rabies and roundworms. It is also a good idea to install a chimney cap and top-seal damper to prevent animals from entering the home in the future.

It is vital that chimney sweeps have the right tools to handle these types of tasks. The main tool is a chimney brush which looks like a giant bottle brush and has metal bristles on it. In addition, chimney sweeps will have a mask and face shield to minimize direct contact with contaminants and other irritants. They will also wear protective clothing and put down a drop cloth to decrease soot levels inside the home.

Preparation

Whether it is a power sweep or not, chimney sweeps use a variety of tools and techniques to clean your fireplace. Their main tool resembles a giant bottle brush and they wear a mask, goggles, and shop vac to decrease the amount of soot that is blown into your home during this process. While they are working in your home, you may want to remove children’s toys from the area and move any furniture that could be easily damaged by a dust or dirt laden brush. You also want to make sure that pets are kept away from the work area as they can get upset by the noises and equipment.

Before your sweep arrives you should ensure that your firebox is completely empty of logs and grate. Also, you should remove any tripping hazards from the floor around the fireplace. Any decorative elements on the mantle should be moved away from the fireplace as well. This will help to speed up the sweeping process and protect your cherished items from accidental damage.

It is a good idea to shut your fireplace and flue 24 hours before the appointment and leave them closed until after the chimney sweep leaves. This is because the ash from your fire will need time to cool down before it is safe for them to pick up. Additionally, the chimney will need to be cool in order for the sweep to use their power sweep rods to remove the creosote from the flue walls.

If you have pets, it is a good idea to keep them secured in another room or outside until the chimney sweep has left your home. This will prevent them from becoming stressed by the noise and movement of the chimney sweeping equipment. It will also keep them safe from the hazard of animals and birds being displaced by the chimney sweep’s efforts.

Finally, it is important to make a clear path from the front door to the chimney so that the sweep can bring in the necessary equipment. You will want to clear a space that is large enough for the sweep’s ladder, broom, and other tools. You should also remove any tripping hazards from the chimney area to avoid them being accidentally kicked or knocked off during the cleaning process.

Tankless Water Heater Repair

If your tankless water heater shuts off randomly, check that the circuit breaker has not tripped. Also, make sure your gas valve is open and that you have paid your gas bill.

Water Heater Repair

If your water is discolored or has a foul odor, flushing your tankless water heater may be needed to eliminate mineral buildup and loose/damaged components. Contact Tankless Water Heater Repair Denver for professional help.

One of the most common problems with tankless water heaters is leaking. This can be a result of damaged or faulty components, such as the pressure relief valve. It can also be caused by corrosion, which happens when metallic parts are exposed to oxygen over time.

Leaking can occur in the gas lines, water supply lines, or on the unit itself. It’s important to inspect and repair these issues promptly to prevent leaks and possible water damage.

If your tankless water heater is leaking, it’s important to turn off the power supply to the unit before performing any repairs. Then, check the circuit breaker to ensure that it hasn’t been tripped. It’s also important to check the water supply valves connected to the unit and ensure that they are fully open. If you are unable to locate the source of the problem, it may be necessary to contact a professional technician for further inspection and repair.

Another common tankless water heater problem is alternating temperatures in the shower. This can be caused by several factors, including the fact that someone else in your home could have showered just before you. When this occurs, the water gets cold while the tankless heater reheats it for your use. To remedy this, it’s recommended that you shut off any additional water faucets to prevent excess use of your water heater.

You can also try flushing or descaling your water heater to remove sediment and mineral deposits that may be causing temperature fluctuations. Adding a water softener and sediment filter can also help minimize these problems in the future.

A hot water heater can also experience ignition failure if the burner is not ignited properly. This is usually the result of a dirty or worn out igniter or flame sensor. Cleaning or replacing these components can fix the issue and return your water heater to normal operation. It’s important to note that this is an advanced repair, so it should always be performed by a professional technician. Attempting to fix this issue yourself can be extremely dangerous.

Frozen Pipes

Frozen pipes are a major pain and can prevent your tankless water heater from working. They can also cause damage to your other plumbing fixtures and lead to expensive repairs. If you suspect a frozen pipe, turn off the gas and power to your unit. You should also close the cold water, hot water, and temperature controls. It’s best to drain your unit before turning it back on. A plumber will be able to help you with this process.

The next step is to locate the frozen section of pipe. This is easier if the pipe is located outside, in the basement, or in crawl spaces. If it’s in a wall, you’ll need to hire a licensed plumber with the proper equipment to safely thaw it. A heat gun or hair dryer can be used to thaw the pipe, but you should avoid using open flames like blow torches or kerosene heaters.

You can also try reversing the flow of water through the frozen pipe to thaw it out. This works well if the pipe is small and has a smooth surface, such as PVC pipe. If the pipe is a larger diameter, you can use a heat lamp to warm it. Wrapping a large towel around the frozen section of pipe can also work, but make sure the heat is directed directly onto the freezing area and not your skin.

If you still don’t have hot water after thawing the frozen pipe, it could be a sign that there is another issue with your tankless water heater. This might include problems with your gas line, flow sensor, or plumbing crossover when hot and cold water mix. A professional plumber will be able to identify the problem and provide appropriate solutions.

Preventing frozen pipes is a simple task that can save you from having to deal with a burst pipe and resulting repairs. Applying fiberglass or polyethylene insulation to all the exposed piping can make it harder for heat to escape during freezing temperatures. You should also consider installing a freeze protection kit or heat tape on the piping. Keeping the distance between your water heater and point of use as short as possible will also reduce freezing risks.

Noisy

While tankless water heaters don’t make as much noise as their tanked counterparts, if you notice loud clattering sounds or vibrations from your unit, it may be time to call for a repair. These rattling sounds are often caused by loose components. This is especially common in older units that have been subject to long-term use. A professional can tighten loose screws and connections to alleviate these issues. If the problem is caused by a gas issue, a professional should also be called to assess and adjust the unit’s gas pressure.

Hissing: A hissing sound from your tankless water heater can indicate that there is a buildup of sediment on the heating element. This is a fairly common issue that can be addressed with regular flushes of the unit. This will require shutting off the power and a drain line, connecting a hose to the unit’s flush valve, turning on the gas valve, and running the water through the system for several minutes. Following the manufacturer’s instructions for your particular unit is important to ensure that the sediment and scale are removed properly.

Banging: Banging sounds from your tankless water heater are typically a sign of “water hammer,” which occurs when water passes through pipes forcefully enough to knock them against each other or the wall. While it may not seem serious, this type of sound can cause damage to your home’s plumbing and walls if left unchecked. Your plumber can install a device to prevent this from occurring in the future and help you to avoid expensive repairs.

Screeching or Whistling: High-pitched screeching or whistling sounds from your tankless water heater can be a sign of loose valves or improper air flow. Check your unit’s temperature and inlet/outlet valves to make sure they are properly adjusted (as per the manufacturer’s instruction manual) and that no obstructions are present.

Rumbling Noises: A rumbling sound from your tankless water heater is usually a sign that there is an accumulation of sediments in the unit. This can be caused by long-term usage or a lack of maintenance. Your professional can clean the unit to address this problem and restore quiet operation.

Cold Water Sandwiches

One of the most frustrating problems with tankless water heaters is the cold water sandwich effect. This happens when you’re taking a shower and the warm, comfortable water you’ve been enjoying turns into ice cold water for a few moments before returning to hot again. This is due to a small amount of cold water getting past the heat exchanger when you turn on your faucet or showerhead. This can be caused by someone else using the same shower or sink right before you, or it can happen if your tankless water heater has been turned off for a while.

This can also occur if your plumbing system was done incorrectly or if the pressure balancing shower valve is in need of repair. The cold water sandwich problem can be difficult to diagnose without the help of an expert. This can include examining your gas line size, recent plumbing changes, patterns of water use and more.

A recirculating pump can also be installed to prevent this issue by creating a continuous loop between the tankless water heater and your outlet valves. This can solve the problem by ensuring that there’s always heated water waiting in the pipes for you to use. However, the recirculating pump may increase your energy consumption so it’s not ideal for every household.

Another common cause of this problem is limescale build up on the heating elements in your tankless water heater. A professional can clean the unit and remove any deposits with a descaling solution to keep your water warm and free from mineral build-up.

If you’re still having trouble with your tankless water heater, don’t hesitate to contact us for assistance. We can help find the right solutions for your home and get your water running smoothly again! We offer a variety of services to address all of your tankless water heater needs and can provide tailored advice that addresses your specific situation. Call today!

The Basics of Roofing

Roofing Company King Of Prussian is the top portion of a building/home and protects against rain, snow, sunlight, extreme temperatures and wind. Roofing can be constructed in many forms and materials.

Homeowners have an astounding amount of roof options – asphalt shingles, slate, metal, clay or concrete tiles. This article will help you understand roofing and how to choose the right one for your house.

The roof is one of the most important components of any building. It protects the structure from rain, snow, sunlight, wind and extreme temperatures. Historically, roofs have been made of wood, stone and a variety of other materials. From the earliest rudimentary lattices of sticks and mud to the magnificent structures in Mayan temples, early European palaces, and cathedrals, roofs have always served as a protective layer for a building.

Choosing the best roofing materials is an important decision for any homeowner. The type of material chosen can impact the durability, cost and aesthetics of a home. Roofing contractors can provide valuable information about the different options available and help homeowners make an informed choice.

Asphalt shingles are the most popular roofing material in the United States. They are inexpensive, easy to install and come in a wide range of colors and styles. They are also fire-resistant and have a long lifespan. However, they do not offer as much insulation as other roofing materials and are prone to damage from high winds and extreme weather conditions.

Rubber slates are another common roofing material. These are often made from recycled tyres and EPDM (ethylene propylene diene monomer). They have excellent durability and have been shown to withstand severe environments with little degradation. EPDM is also eco-friendly, requiring less energy to produce than other types of roofing.

Metal roofs are durable and long-lasting, able to withstand extreme temperatures. They are also fire-resistant and can be designed to look like shingle or tile roofs. They are also highly insulated, providing significant savings on utility bills.

A roof’s covering is not only an essential part of a building, it is an architectural feature that can add to the value of a property. There are many ways to improve the appearance of a home’s roof, including installing solar panels and adding decorative features. There are also many innovations in roofing technology that can reduce a home’s carbon footprint and make it more efficient.

In addition to the type of roofing material, it is important to choose the right framing and support structure for a roof. Having a well-constructed and maintained roof can greatly reduce the risk of costly repairs and maintenance in the future.

Installation

Roofing is a complex and meticulous process that requires the skills of professionals. If you’re planning on reroofing your own home, understanding the steps involved can help you feel confident in your choice of contractor and ease your concerns about safety and quality.

Before any work can begin, the crew must prepare the area. This includes covering any landscaping and movable objects with tarps to protect them from falling debris. It also involves securing ladders and scaffolding appropriately to ensure safety for all workers during the project. On new roof installations, this step also involves removing the old shingles and flashing to expose the underlayment for inspection and repair.

The underlayment is then installed, followed by the first row of shingles. The shingles are fastened with a pattern that alternates between close nails near the edges and wider, more spaced out nails toward the center. Depending on the type of shingle, this may be repeated for several rows until the ridge is reached.

Chimneys, vents, skylights, and other features of the roof must be sealed to prevent water intrusion. This may involve caulking, sealant, or other methods. The contractor will also re-caulk around any pipes or vents running through the roof and re-seal the valleys to prevent water from seeping into these areas.

In some cases, the contractor will apply a waterproof coating to the entire roof surface to provide extra protection and enhance curb appeal. The coating can be a silicone-based product, rubber membrane, or other material. Ask your contractor about the pros and cons of each option, and check with your homeowners insurance company to make sure the type you choose is covered.

Maintenance

Like any part of your home, your roof needs to be maintained regularly. A routine inspection should include a look at the shingles and other roofing materials for excessive wear, looseness or missing pieces, and deterioration. It is also wise to check the integrity of caulking around chimneys and vent pipes, as leaks in these areas can be costly. In addition, addressing any small issues promptly can help prevent them from escalating into bigger problems in the future.

Tools to have on hand for roof maintenance include a hammer, pry bar, nail punch and roofing cement. You can do simple repair work yourself, or enlist the services of a professional to save time and money.

Another important maintenance task is trimming trees that hang over your roof. During stormy weather, these limbs can fall and damage your roof, so it is a good idea to have them trimmed on an annual basis.

Other maintenance tasks can include inspecting roof penetrations, such as skylights, chimneys and vents. These should be inspected for cracking, openings or deterioration, and caulking should be re-sealed as needed. Chimneys should be cleaned of a soot-like substance called creosote on a regular basis. A chimney cap can help to keep rain and debris out of the chimney, as well. Lastly, it is important to have gutters and downspouts in place, as they can help to prevent leaks by routing water away from the roof.

Repairs

While roofs are designed to withstand various weather conditions, they can still sustain damage from severe storms or even age over time. The decision of whether to repair or replace a roof depends on the severity of the damage and the cost. A roofing contractor can help homeowners determine if repairing or replacing the roof is the best option.

Roof repairs are typically less expensive than a roof replacement project, which makes them a popular choice for homeowners looking to save money. They are also ideal for addressing immediate issues that could otherwise cause more extensive and costly problems down the road.

However, it’s important to keep in mind that roof repairs are only a temporary fix. Unless the underlying problem is addressed, recurrent leaks or other problems will likely return. In addition, patchwork repairs can create an uneven appearance on the roof and may not last as long as a new roof.

There are two types of roof repairs: re-roofing and partial replacement. Re-roofing involves placing a second layer of shingles on top of the existing ones. It’s a quick solution to cover up any worn or damaged areas of the roof and prevent leaks, but it’s not as effective as a full replacement. Because the shingles are simply placed on top of the old shingles, they aren’t as secure and can easily be blown off by heavy wind. In addition, re-roofing can void the warranty of the new shingles and doesn’t address any underlying problems.

Partial replacement is more extensive and usually takes longer to complete than re-roofing. It involves removing a section or the entire roof and then installing a new one. This type of roof replacement can be more cost-effective than a full replacement, but it’s important to note that it will take much longer and will not last as long as a new roof.

In general, the cost of a roof repair or replacement will depend on the size of the roof, the material used, and the pitch/design. The more labor-intensive and complex the roof, the higher the cost. The repair type is another significant factor, with a minor repair costing less than replacing structural elements like rafters or trusses.