Fencing provides security, boundaries, and curb appeal. Choose the style that suits your home, budget, and lifestyle.
Before you or your fence contractor digs, contact a one-call number to locate any buried utility lines or pipes. This step is vital for your safety and legal compliance. Visit https://www.maiseyfence.com/ to learn more.
Remove all lawn furniture, planters, kids’ toys, and fixed yard decorations from your property for the duration of the fence installation.
Before beginning any fencing installation project, it is important to gather the right materials. You should also determine the type of fence you want to build and any specific requirements, such as height restrictions or zoning setbacks. Additionally, you will need to know whether your community requires a building permit and make sure you aren’t going to run into any underground utility lines or other obstructions.
Once you have the required materials, it is time to begin construction. Start by marking out the area of your fence line and clearing away any debris or vegetation. Then, dig post holes (if you are using a panelized system), which should be spaced no more than 8 feet apart. It is also a good idea to contact your local “Call Before You Dig” service to be certain there are no existing utility lines running through the site before you dig.
Next, secure the posts to the ground using concrete. For added strength, it is a good idea to bury the posts one-third of their length. Lastly, tamp the soil around the base of each post. This will help prevent the fence from sagging and reduce the chance of future damage.
In terms of hand tools, most homeowners have several standard items in their toolboxes. However, there are a few additional tools you may find useful during the process, such as a post-hole digger or gas auger, a shovel, a mason’s string, and a torpedo level.
Another necessary item is a pair of wire cutters. They are typically available at hardware stores and most retail chains. Some wire cutters are even designed to function as a crimping tool for wire fencing, making them extremely handy.
Posts
The posts needed for fence installation are vitally important and can significantly impact the overall stability and longevity of a fence. There are a number of considerations when it comes to choosing and setting posts, including materials, size, depth, and spacing.
Fence posts need to be strong and stable, especially in areas prone to wind or other environmental conditions that may cause stress. Regardless of material, fence posts should be inspected regularly for signs of damage or wear and tear. Promptly addressing these issues can reduce the risk of more severe problems and ensure that your fence is safe and secure for years to come.
Wooden posts are particularly susceptible to damage, especially rot and insect infestation. Preventative treatments, such as reapplication of wood preservative or application of a rust inhibitor can significantly extend the lifespan of wooden posts. Metal posts can also be impacted by moisture and corrosion, although they are generally less vulnerable to rot than wooden posts.
When digging post holes, it’s a good idea to use a post hole auger rather than hand-digging. This not only makes the job easier but it helps to ensure that holes are dug to the appropriate depth. After digging, it’s a good idea to’sight’ the posts (using a spirit level) to check for accuracy.
If possible, using concrete to set posts is preferred. However, if this isn’t possible or practical, the addition of gravel can help to improve stability and drainage. Typically, angular gravel is preferred as it is more likely to lock together than smooth pebbles. The use of gravel can also help to prevent the formation of puddles and other issues that can potentially affect post stability and longevity.
Rails
The next step in the fence installation process is to install the rails. These are usually made from 2x4s and are used to hold the fencing boards. They are installed at least 6 inches above the ground to keep them from rotting or being affected by moisture from rain and other weather elements. They should be attached to the posts with nails or screws that are rust-free. Start by installing the bottom rails, then add the middle and top rails. You may also want to install a cap board on the top of the rails, which is usually done with western red cedar for a beautiful and decorative look.
Depending on your style of fence, you can use either panels or pickets for the fencing boards. Panels are large pre-fabricated pieces that can be installed to create a paneled appearance, while pickets are individual boards with spaces in between them for a classic white picket fence look. Once the rails are in place, you can start installing your fence boards. Depending on the type of fence you have, this may be the most labor-intensive part of the job.
If you’re constructing a post-and-rail fence, it is best to dig the holes for your fence posts before you begin. You can use a post-hole digger or gas auger to save time and effort. Once the holes are dug, they should be filled with concrete and set in a hole that’s two or three times larger than the post’s diameter.
When you’re building a split rail fence, it is important to know your property line so that the fence does not interfere with public or neighboring properties. Using a survey map or hiring a professional to help locate your property lines is a good idea. You also need to respect any easements or rights-of-way that may affect your project.
Pickets
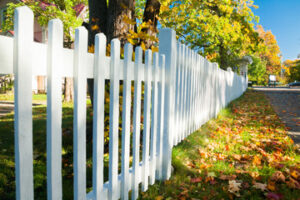
Pickets make up the main portion of your fence. Different fence styles use different types of pickets. For example, a picture frame fence may use dog-eared pickets while a standard nail-up fence will use flat-top pickets. Pickets are usually made of wood, but they can also be made of steel or vinyl. In addition, pickets can be curved or straight depending on the style of your fence.
Before you start digging your post holes, it’s a good idea to lay out all the posts, rails, and pickets in the general area where they will be installed. This will help you double-check your measurements and ensure that all future post holes are set in a straight line. It will also help you avoid costly mistakes, such as drilling into a utility or water line.
Once you’ve prepared the area and buried your posts, you can begin to build the fence framework. First, you’ll need to dig 10-inch-diameter post holes at the locations where you want your fence posts to be placed. Make sure to space them at least eight feet apart to prevent sagging. It’s a good idea to use pressure treated posts, as they will be more resistant to moisture and decay than wooden ones.
Next, you’ll need to install the supporting rails. These are the horizontal beams that connect your posts and to which your pickets or boards will be attached. Using the same material as your posts, the rails create clean lines that complement your fence’s vertical pickets or boards.
Wooden fences can be painted or stained to match your property’s landscape or to provide a more distinctive look. Choosing a color that suits your property is important because it will determine how your fence will blend in with the surrounding greenery and other structures.
Gates
When building a fence, one of the most important pieces is the gate. It will protect your property from unwanted intruders and provide a sense of security. It is also a decorative element that can enhance the look of your home or business. You can choose between many styles, colors and materials for your gates.
A classic picket gate has evenly spaced pickets and offers a timeless design. If you prefer a more contemporary look, consider an arched gate or a lattice gate.
Whether you choose wood or metal, gates require proper treatment to ensure long-lasting beauty and durability. A high-quality wood sealer or stain will protect against moisture, UV rays, and other environmental elements. It’s a good idea to touch up the protective finish periodically and apply more as needed.
Steel gates need a special finish to prevent corrosion. A galvanized coating provides a long-lasting, attractive finish that can be maintained with periodic refinishing. If you prefer a more natural look, a wood gate can be treated with a preservative to help resist decay and insects.
If you want your gate to stand out, consider customizing it with hardware, latches, or unique colors that complement your fence and home. You can even add a specialty door lock to make your gates more secure. You can also choose to automate your gate if you prefer. Gates are available in widths tailored to suit all types of pedestrians, vehicles and landscaping equipment. You can also opt for a double gate to maintain traffic flow and safety.